
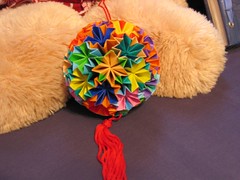
Here's the one my mom made, the model for this project. (That's my bear Frank in the background holding it up.)
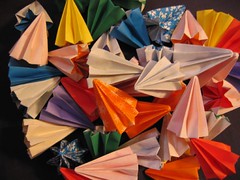
And here's my starting material: 40 paper cones.
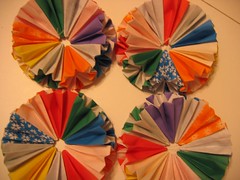
You arrange the cones into four rings of 10 cones each, then tie them together so each ring lays flat.
Then you stack up the rings, and carefully weave them together one at a time using thread, following a specific pattern. Finally you pull the thread tight, drawing the cone rings together into a ball shape. Here is my final result:
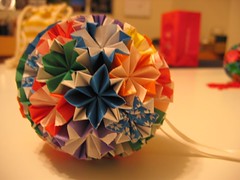
I used a loop of white ribbon for a hanger, and Mom used some red cord. Plus, hers has a cool tassel at the bottom! Mine looks more like an egg than a ball, because I should have pulled the thread a little tighter. But overall, not bad! Now if I can just remember how to fold the paper cones...
wow. you're way ahead of me. i'm still folding the paper cones.
ReplyDelete